Monument One
Welcome to the first Monument AI tutorial! We’re kicking things off with the aptly named Monument One workflow, the foundation of all workflows to come. This tutorial breaks down each component, explaining both the "how" and the "why" behind the structure.
Let’s go.
PS: If all you need is the JSON file, scroll all the way til the end to get it ;)
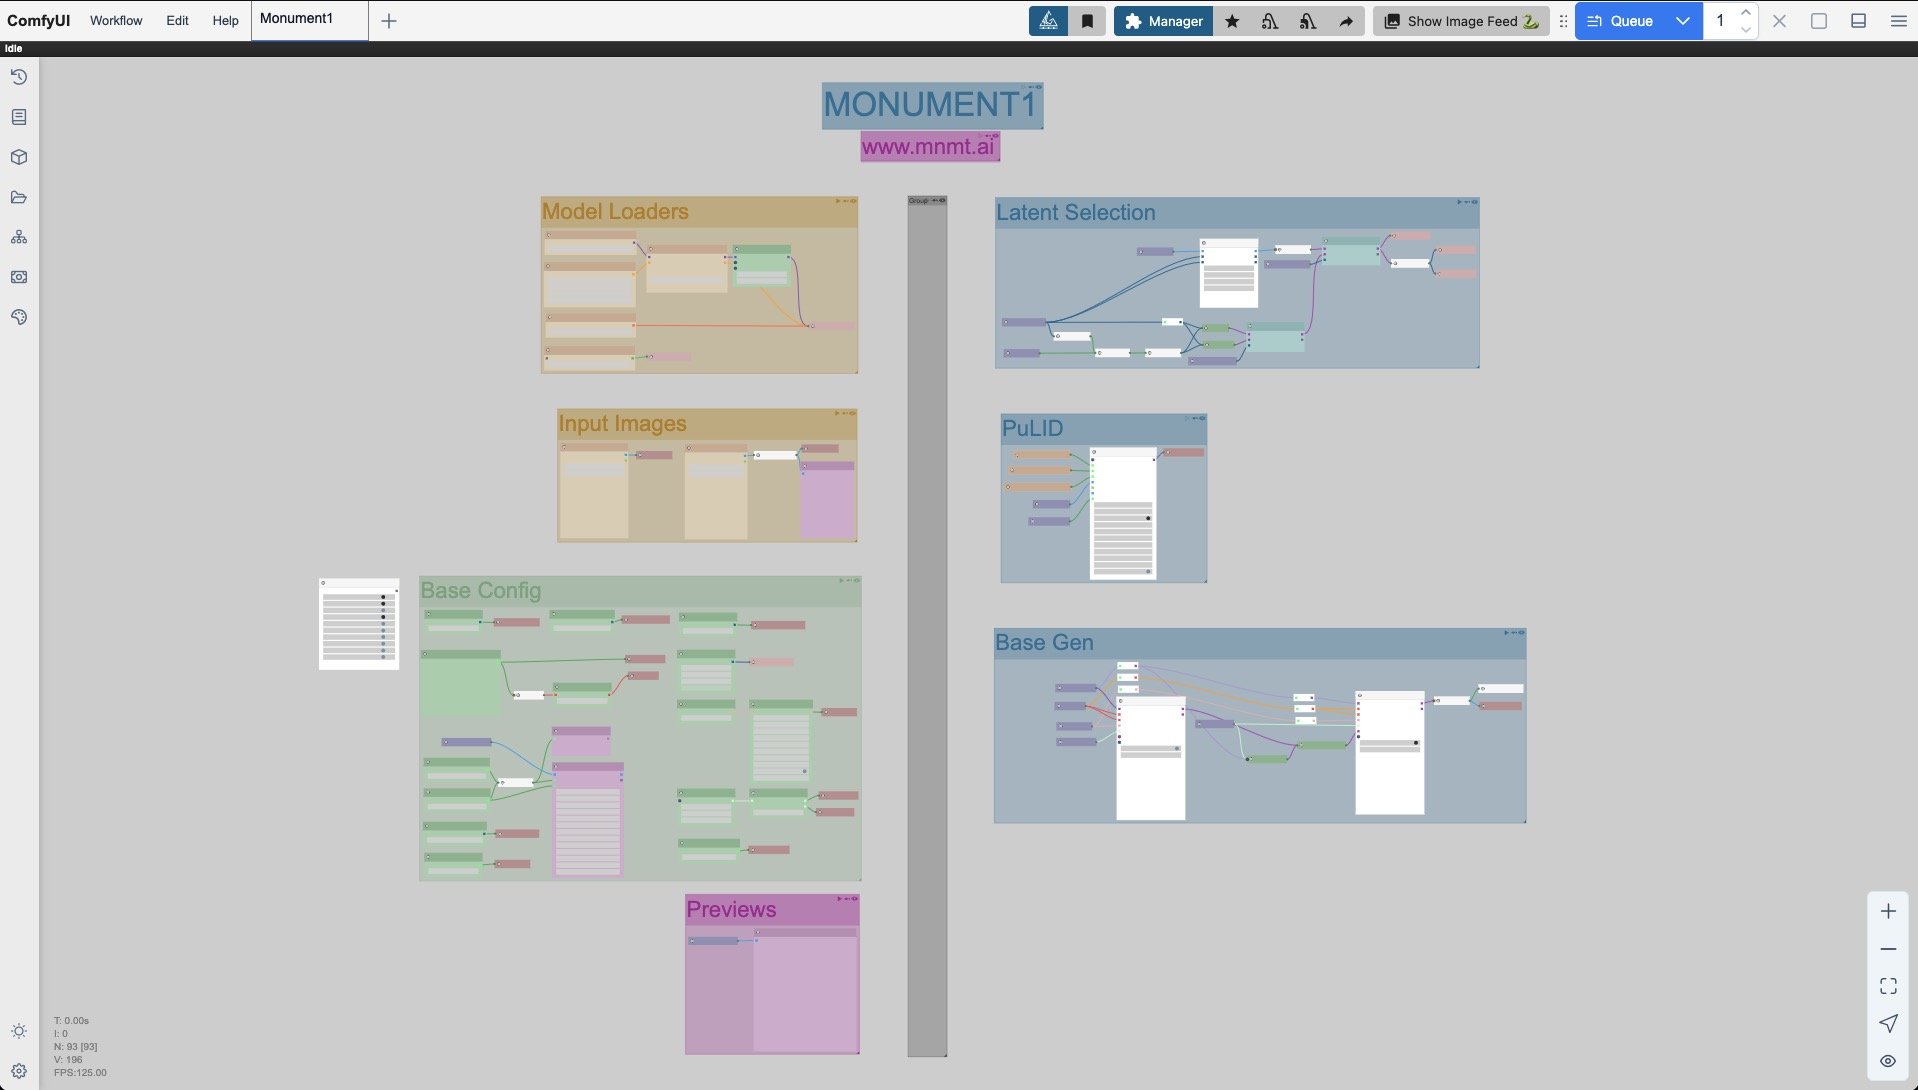
A birds eye view of the founding blocks
Overview
Monument One is a modular workflow that separates the image generation process into 2 main logical components, not unlike a brain. The left column is all about user inputs while the right one is where the system crunches its maths. This design allows for better organization, easier troubleshooting, and more flexible customization compared to monolithic workflows.
The layout flows from left to right as expected from most node graph editors (not looking at you Houdini), but it also utilizes columns’ top to bottom viewing to maximize screen space and avoid stretching too far on the horizon. We thus maintain clarity at all times, even as the workflow grows in complexity (which it will).
As such, nodes never backtrack to ten different places, nor do they mysteriously connect under other nodes.There’s extensive use of Get/Set nodes as well as the Anything Everywhere nodes to improve that overall readability and avoid the mess of spaghetti hellscapes. Those who know, know.
Requirements
ComfyUI obviously (v0.3.19 recommended)
The following node packs:
Footnote: Many will claim that I can easily trim a few of them off, because many node packs’ features tend to overlap, and they’d be right. That list has been building over time across many workflows, and I feel like certain packs do certain things slightly better than others, though it's far from scientific. But they stuck around. Feel free to replace at your discretion (and let me know if you do).


Structure & Philosophy
Once again, M1 uses compartmentalization to separate distinct functions. This approach follows the principle that workflows should be readable, maintainable, and adaptable. Each section serves a specific purpose in the generation pipeline, notably:
Models Loaders: everything from the main model to the CLIP and T5, as well as LoRA and VAE are loaded here. In subsequent tutorials, we’ll also load things like Controlnets.
Input Images: the only place where we’ll load images to control things like img2img and PuLID. In subsequent tutorials, we’ll add in Controlnets and Redux.
Previews: Self-explanatory. In subsequent tutorials, we’ll add in the upscale results, as well as features such as ground truth image comparers.
Base config: The heart of user centric inputs. Every relevant parameter will be directly interacted with here and nowhere else.
On the generation side, groups have been divided so far into three main components:
Latent selection: this is where the system will route either img2img or txt2img according to our input in Base Config
PuLID: to help improve the fidelity of the character LoRA by steering the generation thanks to a ground truth image. We are indeed loading more models here rather than in the Models Loader group. Because PuLID is not always needed in every workflow, this approach allows us to disable the entire group when unused, reducing memory consumption by preventing unnecessary model loading.
Base Gen: The heart of the image generation pipeline. You’ll notice we’re splitting it into two samplers instead of the typical one. That’s because we’re injecting a small amount of random noise to the second sampler, to help both improve the coherence and detailing of the final image.
Color Nomenclature
The workflow uses a color-coding system to enhance visual organization and find things quickly:
Yellow : Model and Image loaders
Blue : Get nodes
Red : Set nodes and Anything Everywhere nodes
Green : User editable
Purple : Viewers and Save nodes (outputs)
Cyan : Switches
Grey : transit nodes or any other nodes that do not fall within the above categories
Tying Everything Together

1. Loaders
Where every model, from the main flux.dev to the CLIP and T5, as well as LoRA and VAE are loaded here. Controlnets will follow in subsequent tutorials.
We’re using GGUF as much as possible to save on VRAM while minimizing any quality hits that may occur. For that reason, we recommend Q8 for both Flux and the T5 encoder. We’ve had hit or miss successful gens with Q6, but those may come in handy if you have low VRAM.
I’ve kept the ModelSamplingFlux node here for convenience, as it’ll affect the rest of the process upstream. While not absolutely necessary, I found it helps in refining details and adding an additional layer of coherence to the generations.
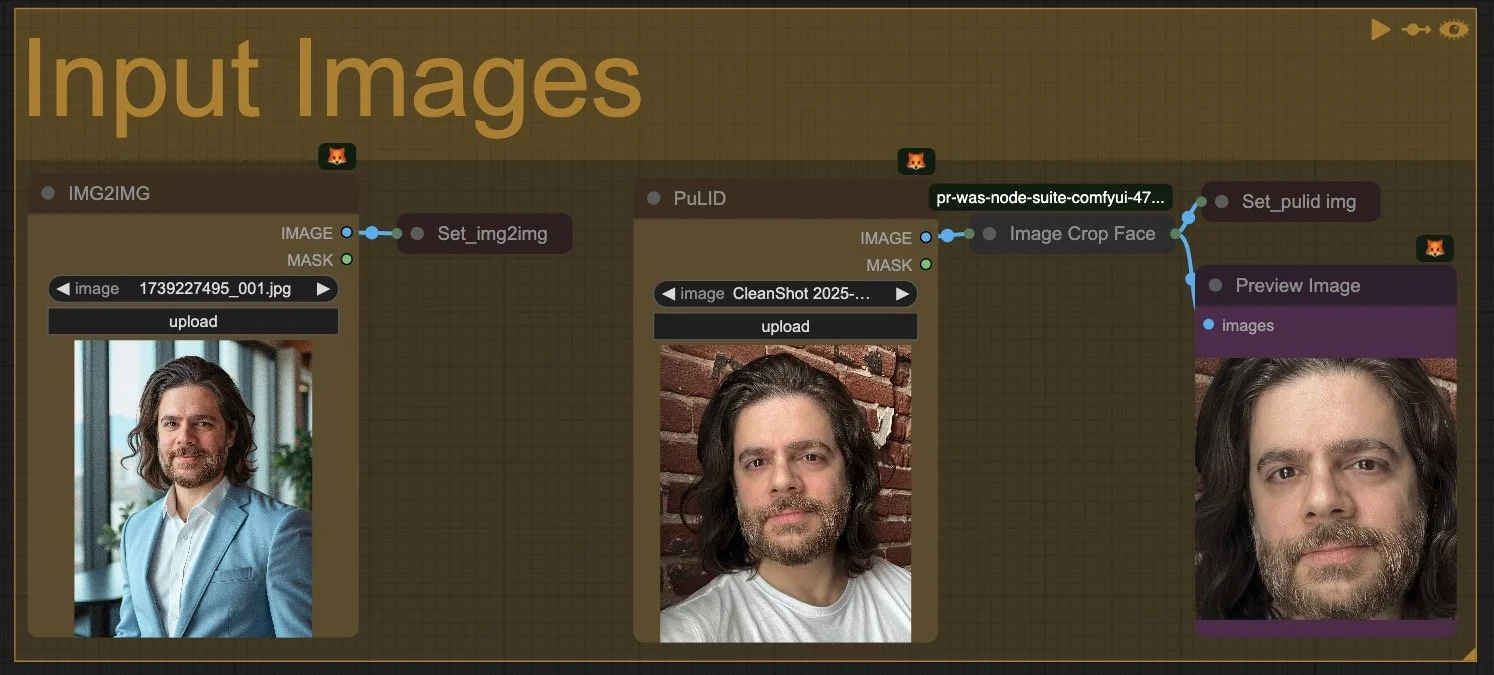
2. Input Images
Pretty self explanatory. You'll notice I added an automated image cropping node as PuLID tends to perform better with clear and cropped faces. Might do a small exploration into it in a subsequent tutorial.

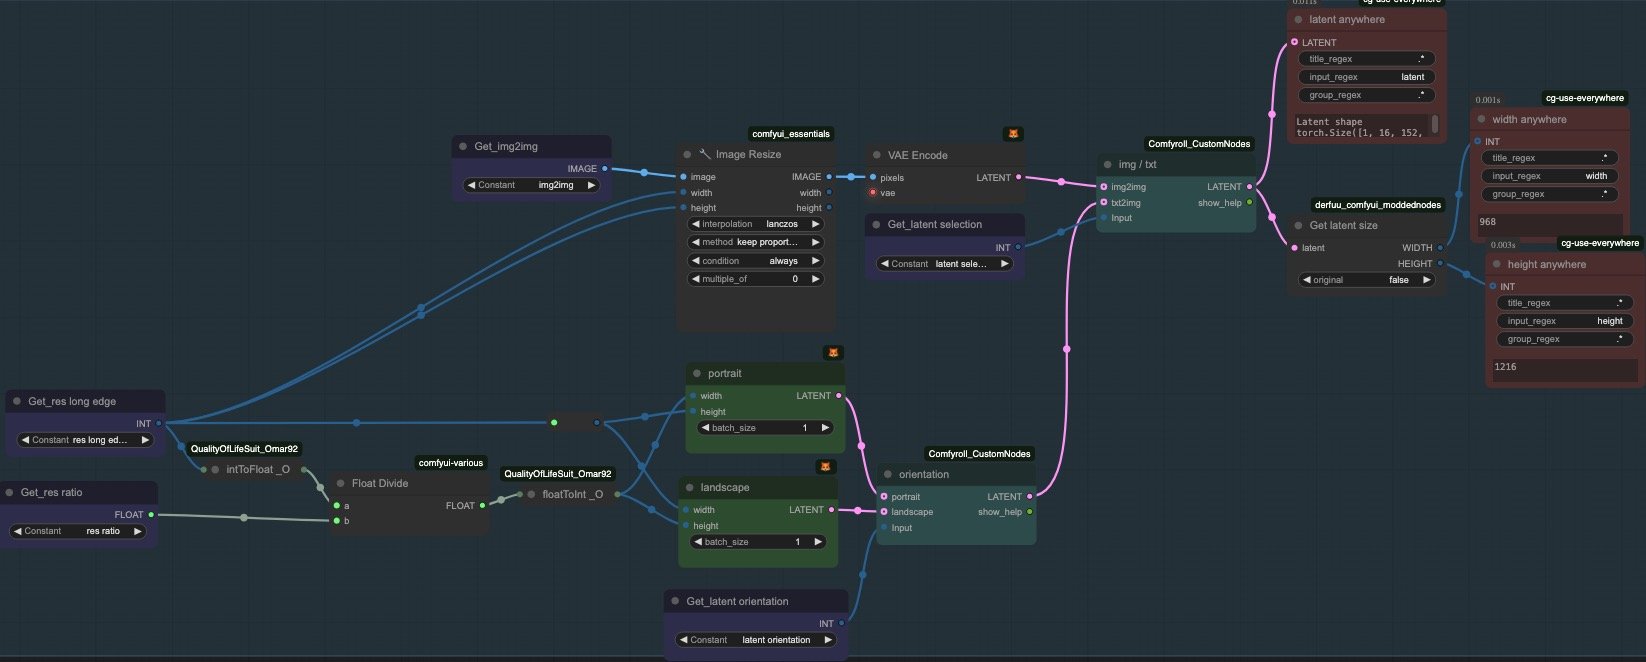
3. Latent Selection
This is where the switch between img2img or txt2img happens. The img2img path takes the image through the Get node and resizes it according to the Long Edge integer we've set in the Base Config. For txt2img, this same Long Edge integer is divided by a ratio value (also set in the Base Config group) to generate the appropriate latent dimensions. Notice the additional switch to help choose either portrait or landscape orientation.
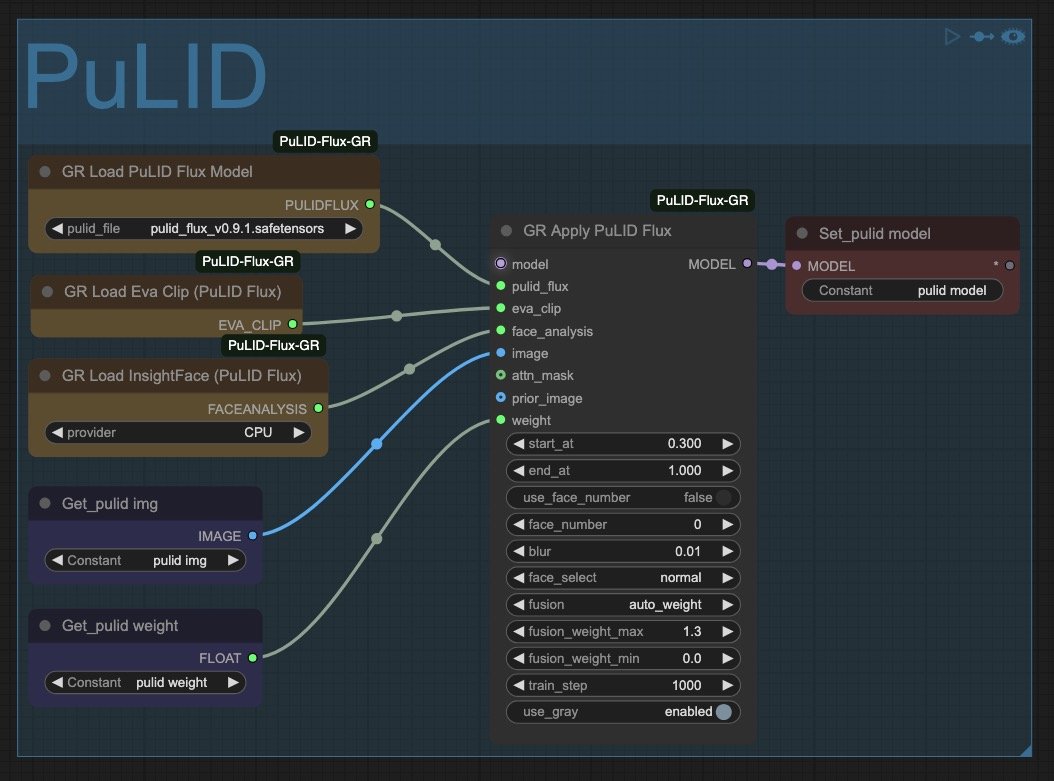
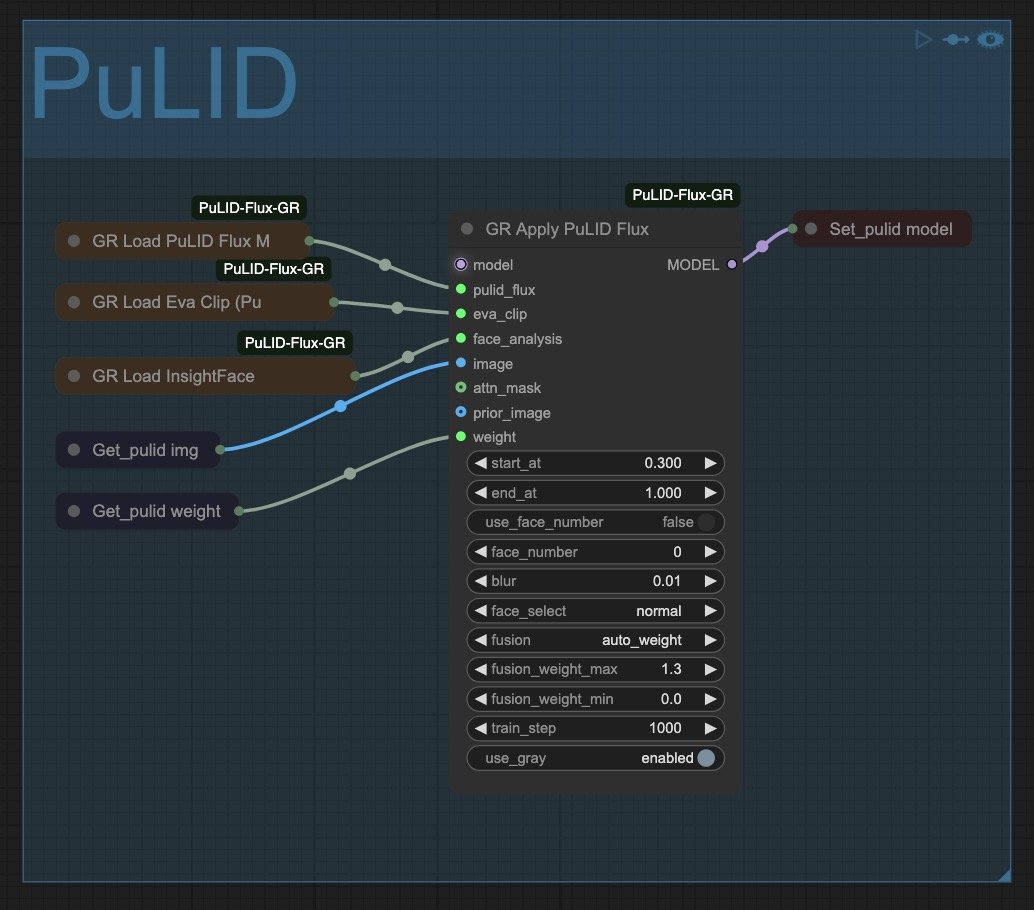
4. PuLID
If you're using a character LoRA, Pure and Lightning ID will essentially help you seal the fidelity by nudging the generation towards a ground truth of your choice. I typically see the LoRA do 90-95% of the heavy lifting while PuLID cements the remaining 5-10%. Some may use it for creative purposes, but I view it as a last-mile type of optimization.
That's why I never go above 0.2-0.3 of weight (Getpulid weight) and fix the start_at value at 0.3. This means it won't have any effect during the first 30% of the generation process, and when it does kick in, it'll only apply 20-30% of its strength. This approach is designed to carefully contain its effect, as too much PuLID can contaminate and destroy a generation by forcefully imposing the ground truth image on i
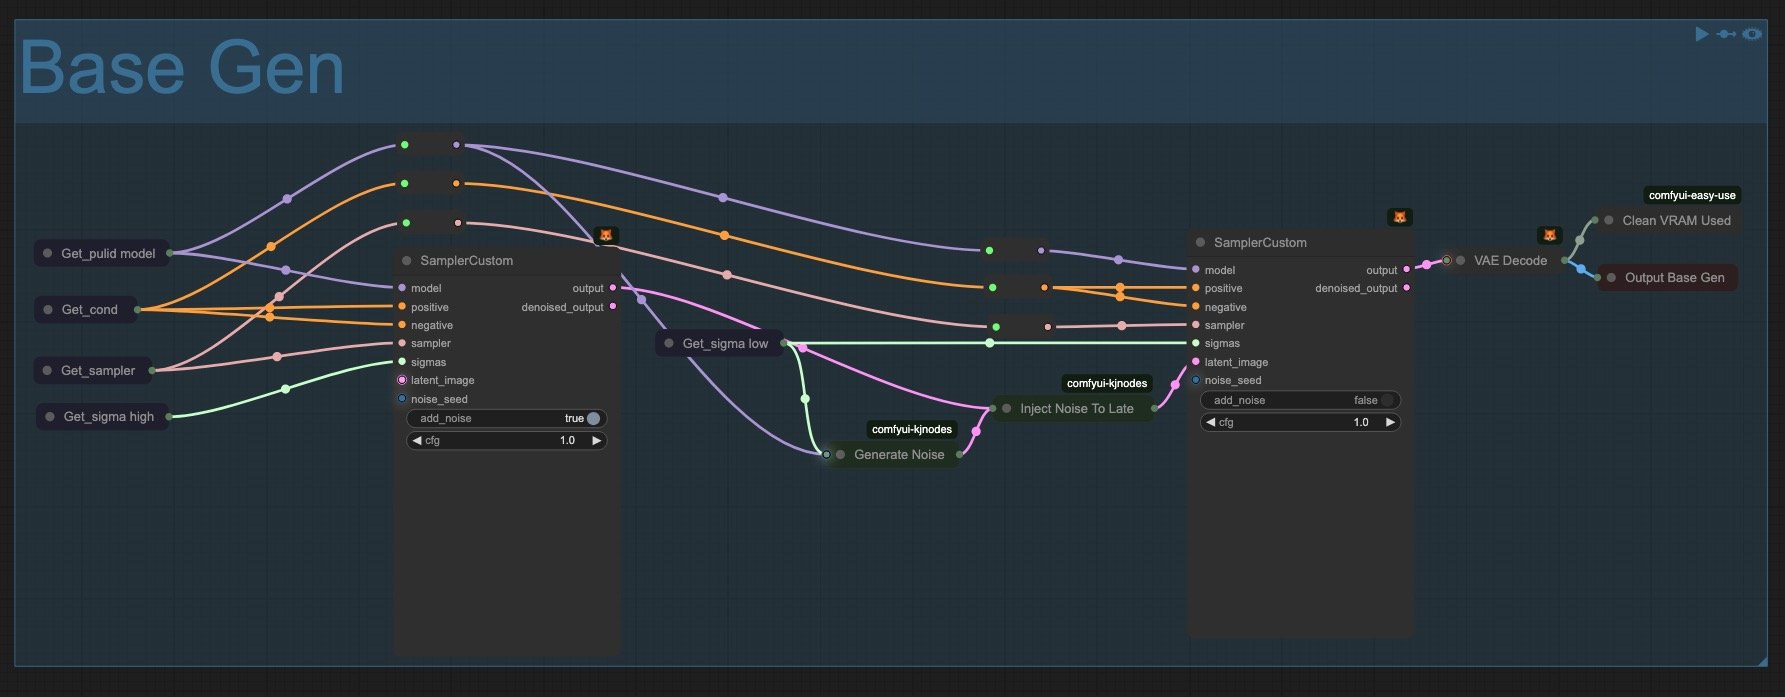
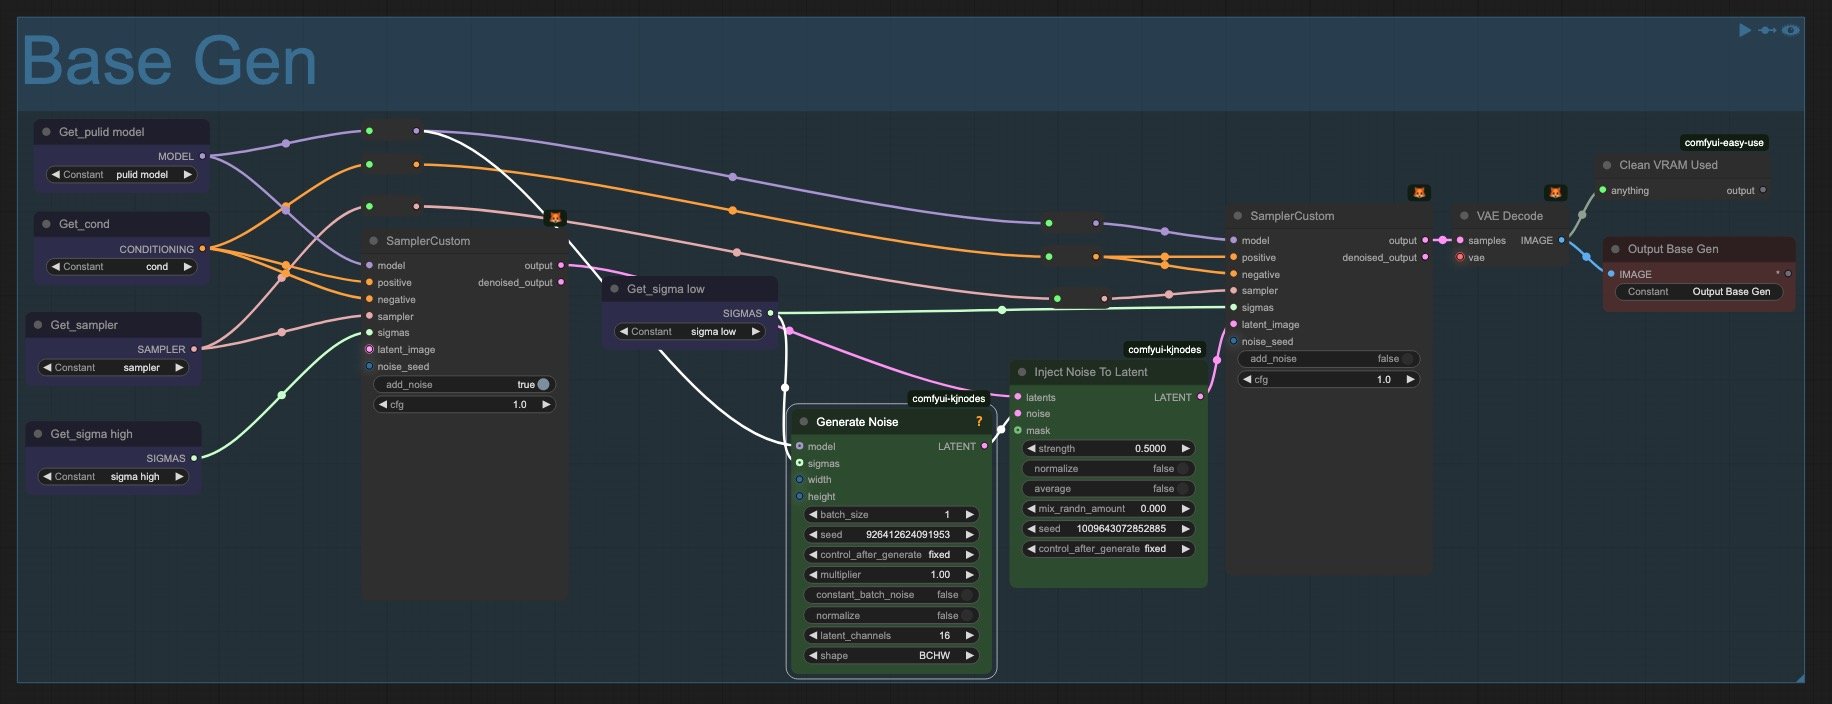
5. Main Generation
The core image generation process occurs in this section. It looks fairly clean and legible thanks to the Get/Set nodes. The only "complexity" is the noise injection nodes. I considered moving them to the Base Config group, but since they're rarely modified (even though they're color-coded green), I decided to keep them here. Beyond that, this section is straightforward. It's where the actual image creation happens based on all the previous configurations.
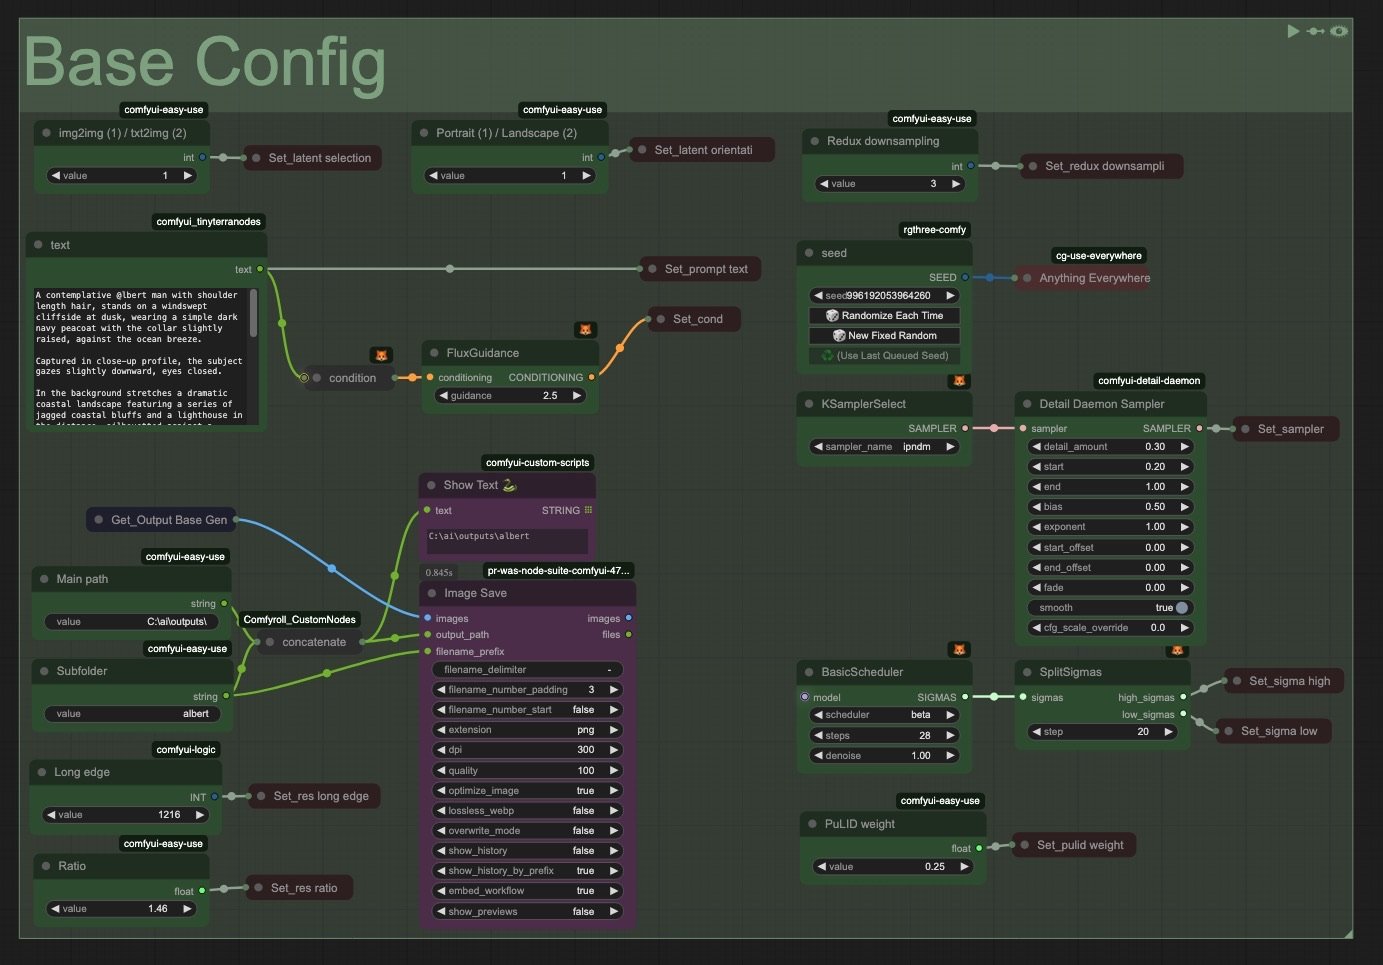
6. Base Config
I didn't expect to enjoy this condensed space for inputs, but it's really grown on me even though there's room for improvement. I see it as a control panel where everything is accessible and makes sense at a glance. I've also found that once everything is set up, I'm mostly just interacting with the prompt box and seed values. The other parameters don't change much over time. They should really be positioned closer together in future versions.
I'm also quite fond of the Daemon Sampler node. It noticeably improves the fine details in a way that's subtle but impactful. Values between 0.1-0.3 work best in my experience. It really changes the image for the better once combined with the noise injection in the Base Gen group. Everything’s more focused, polished and brimming with micro details even at low resolution.
Speaking of detail (and realism), try keeping guidance between 2.2-2.5. You’ll avoid the dreaded Flux chin, very crunchy contrasts and a a general plasticky feel.
This concludes our first tutorial together and my first ever publication. I consider this more of a general overview and first-stone-being-laid kind of article rather than an exact step-by-step guide, but those will come later I'm sure. I hope it was able to inspire or teach you a thing or two. And of course, help you in your gen AI journey. Let me know how you tweak it to your own style and what you end up creating with it!